
Image oddities
Something strange about your Liverpool Telescope observation? All images taken of space can have certain quirks, here is some information on the most common things you can find:
- Why are my images dark?
- Why are my images blurry/grainy?
- Why are my images brighter than other observation images of the same object?
- Why do the stars in my images look strange/why do they have splodges in the middle?
- Why don't my images include the entire object?
- Why does my image have a bright line going straight through it?
- Why does my image have a dark line going straight through it?
- Why does my image have small lines or dots scattered across it?
1. Why are my images dark?
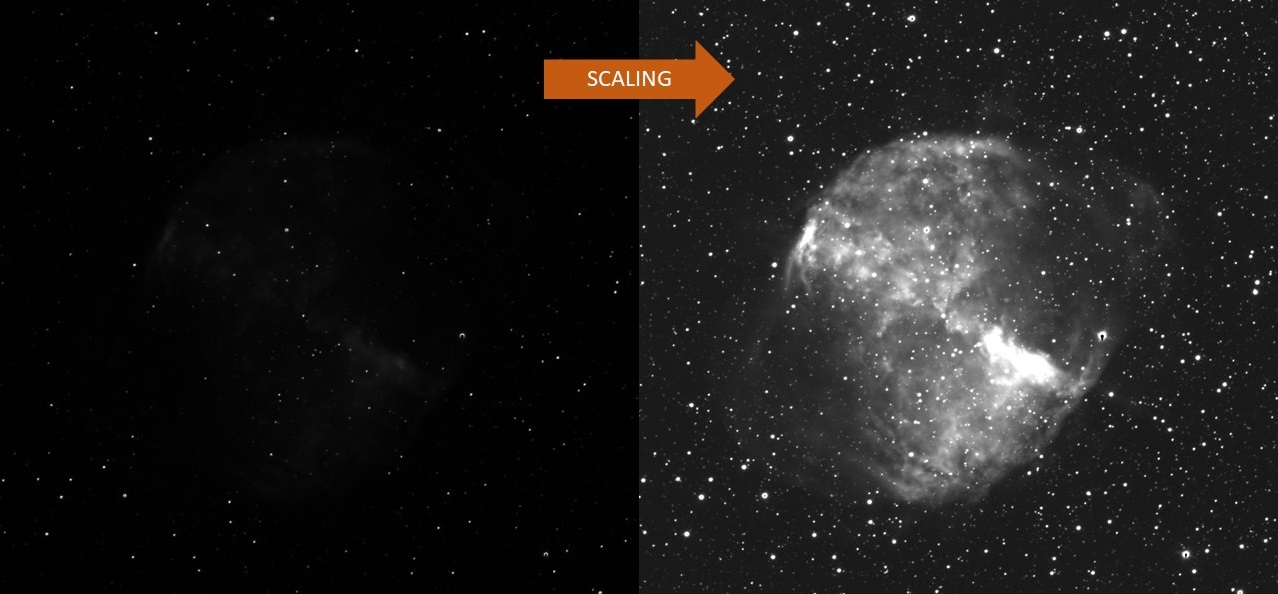
One of the first things you may have noticed when you have loaded your image(s) into a FITS reading/processing software is that to start with, the images are very dark and not much detail can be seen. This is because the software is designed to count the number of photons hitting the detector, not to create pretty pictures on their own! All we need to do in this case is to change the scaling of the image(s) in the Display menu using the sliders. This should reveal some more detail:
If you are making a 3-colour image we can only do this in LTImage; first add the images into a 3-colour image and then separately change the Pixel value range for each colour/filter. You will find that reducing the maximum pixel value (often by quite a lot) will bring out more detail and brighten your image.
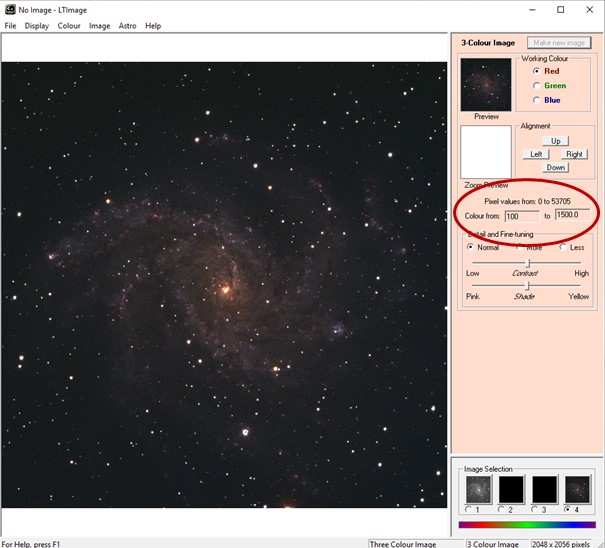
Note: In this case the pixel values have to be changed for all the separate colours to combine them!
2. Why are my images blurry/grainy?
There are a few things that we have to take into account here, some under our control and some that are not:
The Moon
Much like how we cannot see stars during the day due to the brightness of the Sun, we get a similar effect from the Moon. The Moon gets brighter as it reaches the Full Moon phase. It reflects light from the Sun onto our atmosphere which makes the night sky brighter. This is great for getting some nice Moon shots but makes faint objects very hard to see. With deep sky or faint objects, changing the exposure time will make no notable difference. This is because the camera will still collect the scattered photons coming from the Moon. So the best time to observe such objects is when the Moon is a New Moon. Then it is not reflecting as much of the Sun’s light down onto our atmosphere. This is when the sky is at its darkest. There is an option in our Go Observing section where you can choose to observe when the Moon is ‘Up’ or ‘Down’. This will maximise your chance of getting a high-quality image.
Seeing
In astronomy, seeing is the name given to the effect that makes stars ‘twinkle’. Stars do not actually ‘twinkle’ at all. The photons from these objects have travelled for years in a straight path but get ‘knocked around’ as soon as they reach our atmosphere. The twinkle that you see is the photons hitting and/or being scattered by particles in the atmosphere. Seeing is mainly caused by turbulence in the atmosphere. How high the observing site is makes a difference, the higher you are, the less atmosphere for the photons to travel through. Engineering can correct for different levels of seeing on the night of observation due to turbulence, but it still poses its challenges. If your image is slightly blurry, it is likely that the seeing on the night of the observation was not good and the photons were scattered more intensely. The best quality images come when the atmosphere above the observing sight is at its calmest. As a calm atmosphere cannot be planned, if you are not happy with your image you will have to submit a new observation request.
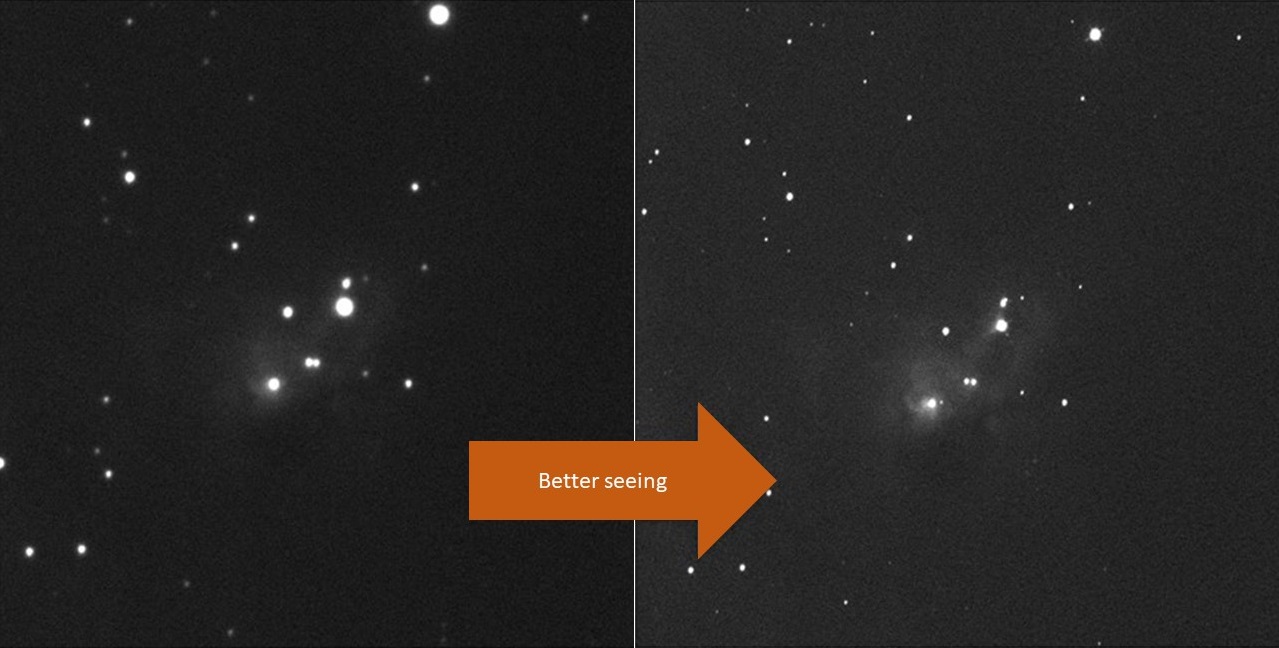
We can see that the image on the right is clearer and has more detail. The stars and clouds on the left are blurred and fuzzy.
Seeing also has different effects on different filters, as they observe at different wavelengths. When using RVB filters for your 3-colour observations, the B filter (closer to the ultraviolet side of the electromagnetic spectrum) suffers more from the conditions of our atmosphere so will sometimes look grainier than either R or V filters.
You can learn more about the effects of seeing in our Seeing Workshop.
3. Why are my images brighter than other observations of the same object?
The answer to this is usually exposure time.
The camera collects photons from the entire field of view, not only the object being observed. Longer exposure times (30-120 seconds) will make the whole image brighter.
4. Why do the stars in my images look strange/why do they have splodges in the middle?
You may have an observation with stars or bright regions that have blocky/smudged centres of colour that ‘bleed’ out onto the image. This is called saturation. It is most common when trying to observe a faint object, like a nebula when there are also bright stars in the field of view. When observing with a high exposure time (for example, 120 seconds) then the detector collects more photons from the dim areas of an object and thus more detail. But, some stars in the field of view can be much brighter than anything around them and the detector will also collect photons from these stars for 120 seconds. This saturates the pixels on the camera; there are simply too many photons for the detector cell to hold and the charge bleeds into the surrounding cells (see our page on CCDs). The best way to observe an object like this (a faint object but with bright regions/objects in the shot) is to take many low-exposure observations and then stack them together. This will make objects such as stars brighter, but it will not saturate them.
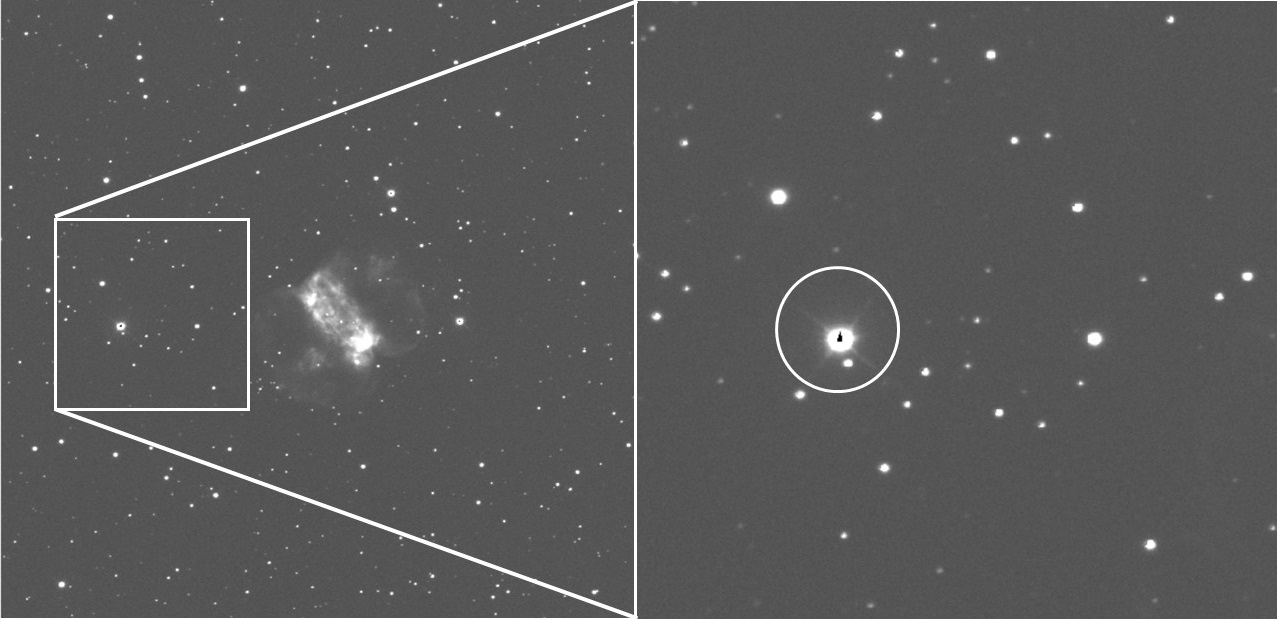
diffraction spikes coming out from the star.
5. Why don't my images include the entire object?
You may notice that when observing an object such as the Rosette Nebula, or the Fishhead Nebula, you cannot see the whole thing. This is because some objects are so big in that the entire object cannot fit into a single frame of the camera. The Liverpool Telescope does not have the ability to zoom in and out of objects, but has a set field of view on the night sky!
6. Why does my image have a bright line going straight through it?
You may have found an image that looks like this whilst using telescope observations:
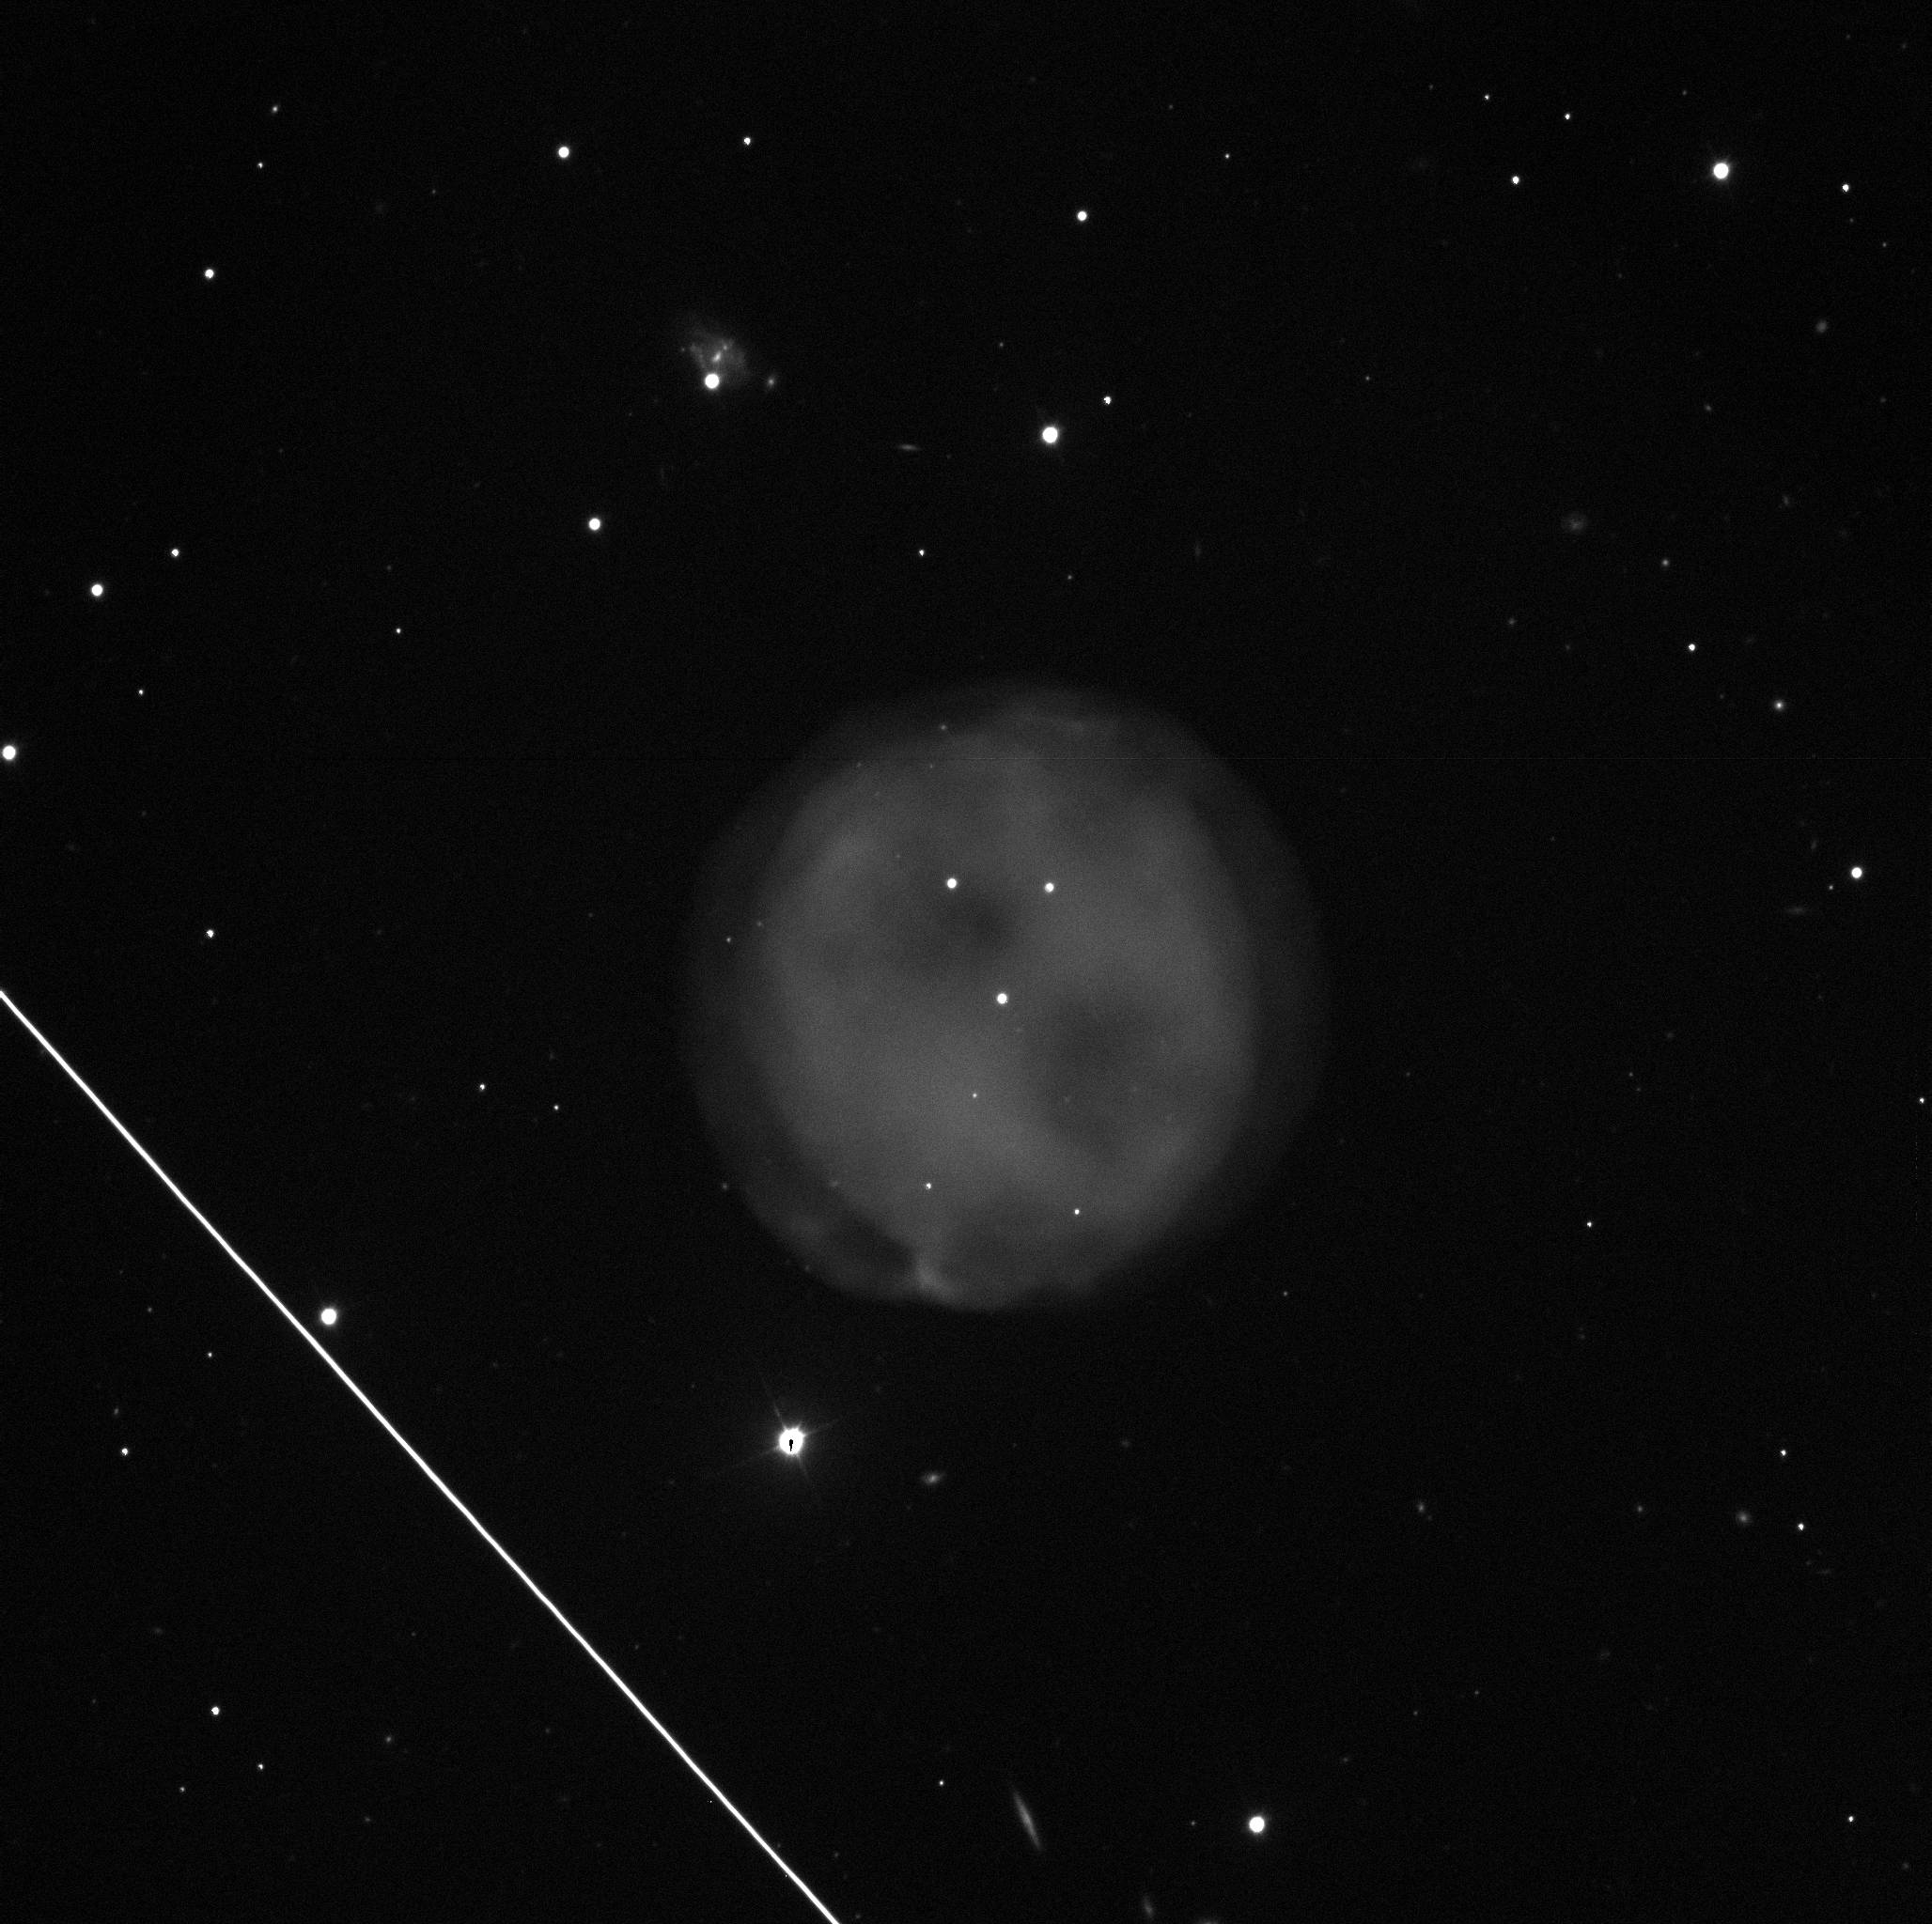
As we can see, there is a bright straight line cutting across the image in the bottom-left. This is in fact a satellite! Sometimes satellites just happen to cut across the Liverpool Telescope's field of view whilst it is observing a target. The chances of this happening are quite slim, so they only appear in a few images. Sadly, there is no option to remove the line from the image, only to request another observation!
You may be wondering why the line is so bright compared to the stars in the image. This is because the satellite is so much closer than the objects we observe (a few thousand kilometres rather than light-years away). We capture the small amount of light that the satellites reflect from the Sun, Moon or light diffracted by Earth's atmosphere that hits it. This means the images can collect a lot of the light bouncing off!
7. Why does my image have a dark line going straight through it?
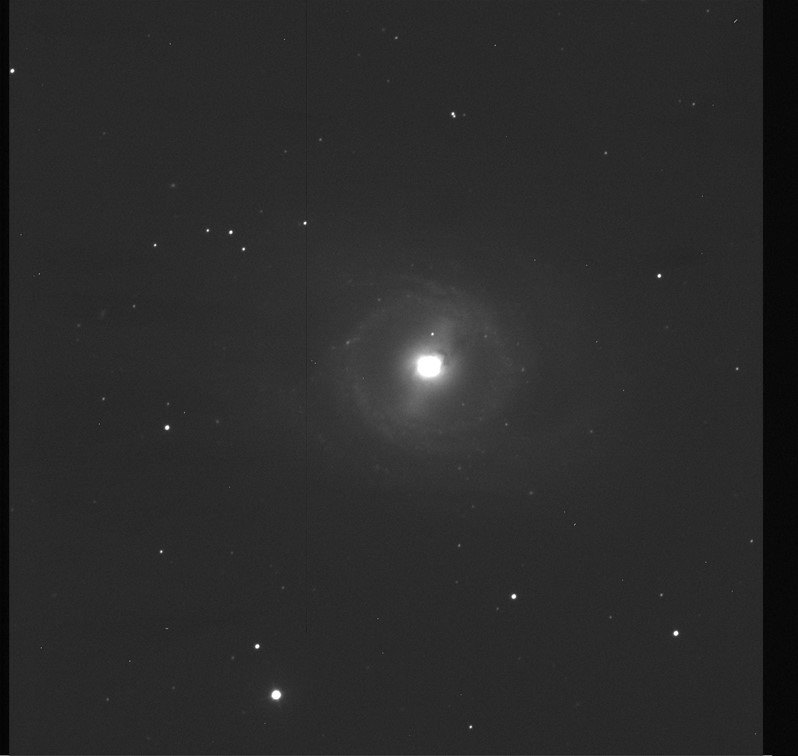
You may have also come across an image which has a similar problem to this:
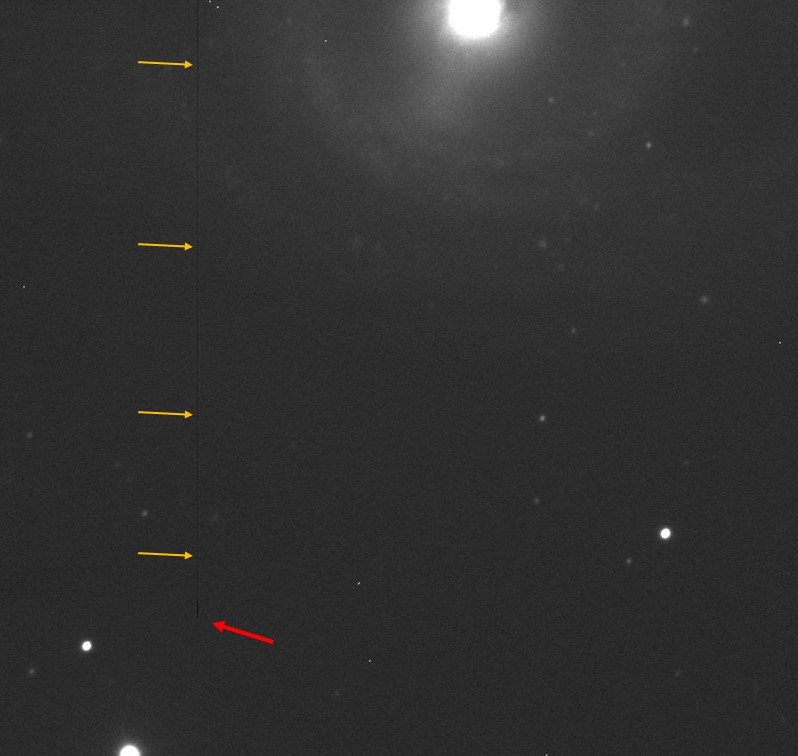
which makes the above pixel information void.
Sometimes on your observation, a vertical dark line may appear. These are called dead pixels. They are specific to how a CCD camera (the camera used on the back of a telescope) works and how they read out data. The lines can vary in length depending on how far up the CCD the bad pixel lies. As a CCD reads out in vertical lines, a 'dead' pixel when read out will make the data void for the rest of the column. This is why the line then carries up to the top of the image.
8. Why does my image have small lines or dots scattered across it?
Sometimes, you may find small lines (usually a couple of pixels) scattered across your image. They can be white (on a single-colour image) or coloured depending on the filters used. The white version will look something like this:
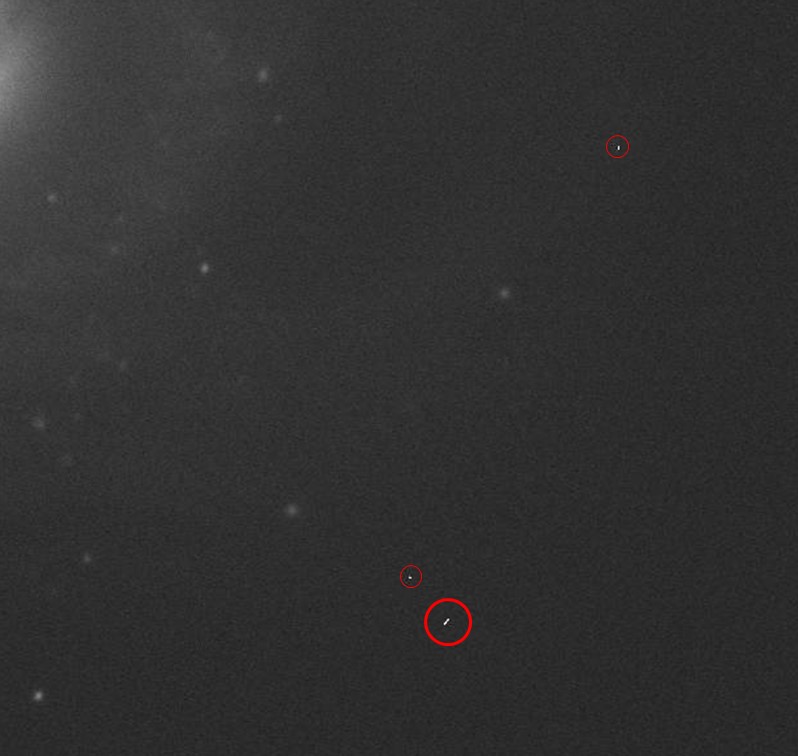
If you have a coloured image, these will appear as coloured pixels/lines. The reason for this is that tiny particles called cosmic rays are constantly finding their way through the atmosphere and hitting the telescope detector. Cosmic rays can come from inside our Solar System or from outside. The lower-energy ones come from the Sun and the high-energy ones from events outside the Solar System (like supernova explosions). The particles travel close to the speed of light. Stopping cosmic rays from hitting the detector is impossible, but there are processes which can be done to the image to even it out. The Schools' Observatory usually does this before you get the image back... but some can slip through the net!